1. Login to your FreePBX Installation and in the top menu go
Connectivity -> Trunks. Click on the
Add Trunk button and select
Add SIP (chan_pjsip) Trunk.
2. Enter the Username and Password of your Crazytel SIP Trunk.
3. Make sure
Authentication is set to
Outbound and
Registration is set to
Send.4. Enter the
Domain of the trunk and the
Port as 5060.
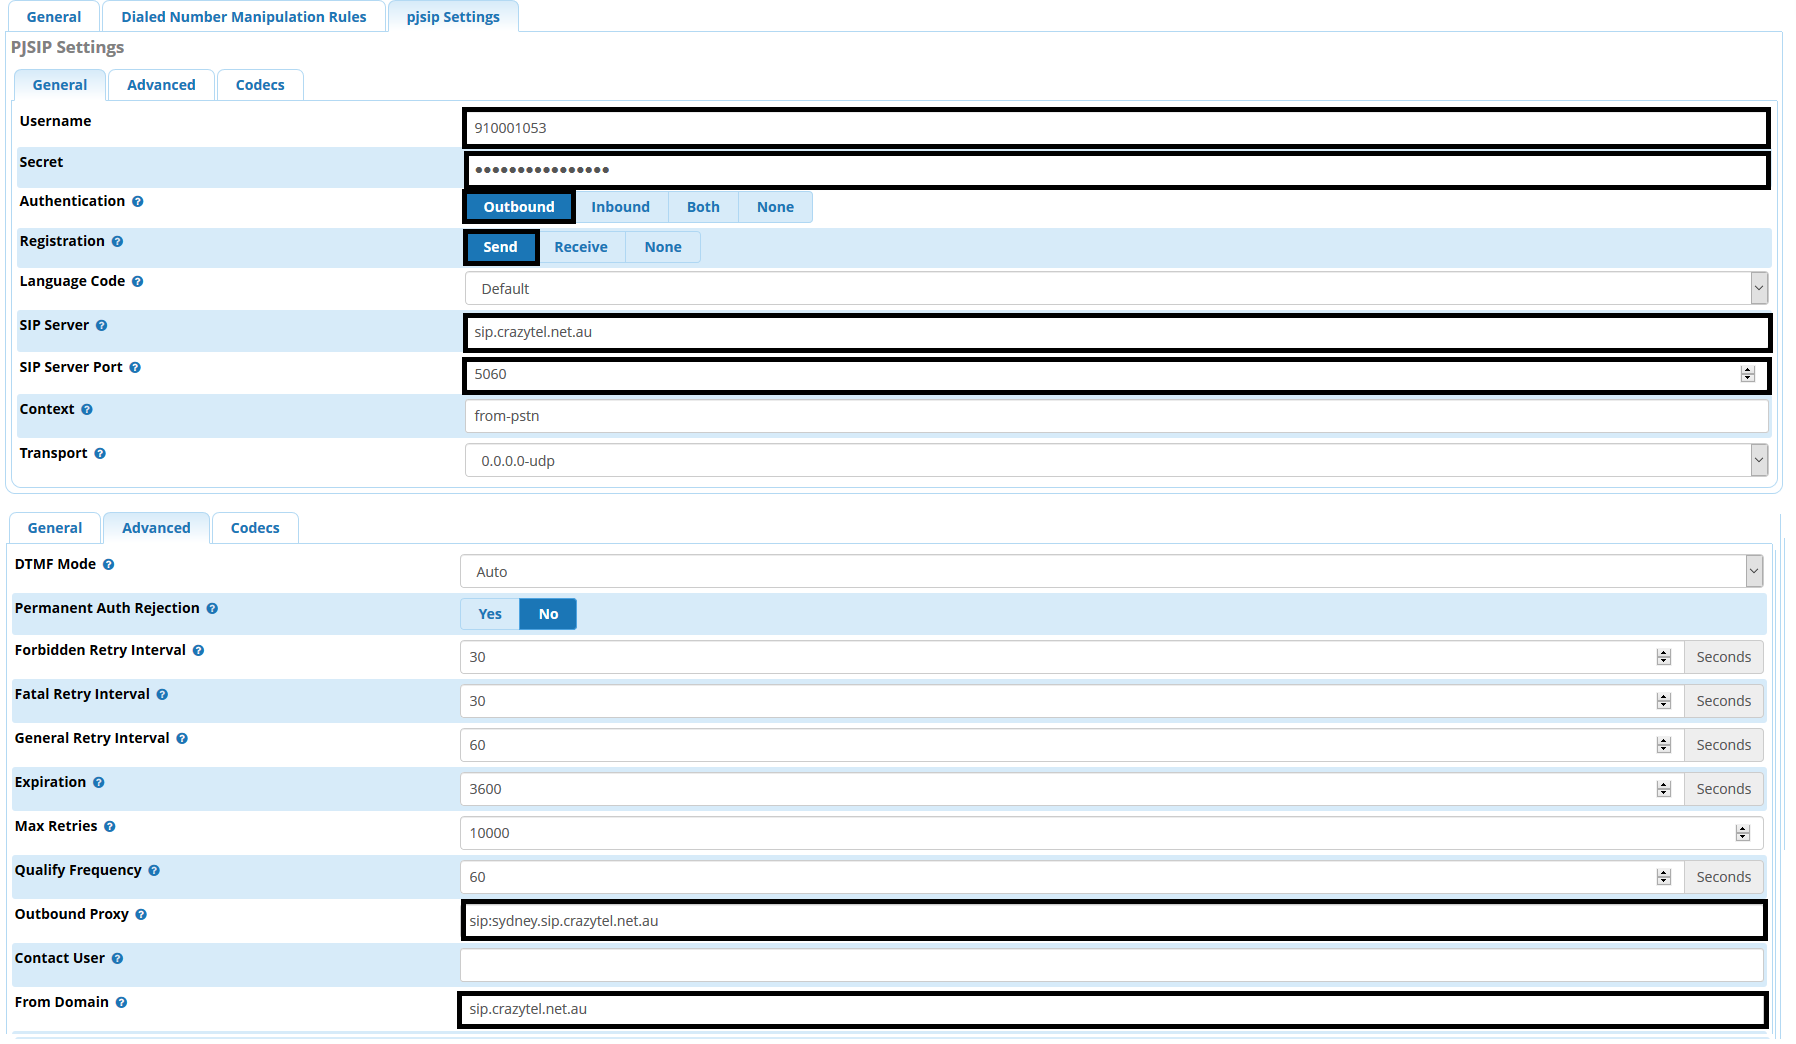
5. Under the
Advanced tab, make sure that `from domain` is set to the domain. You can also set
Outbound Proxy, if needed, here as well.
To finalise the process you will need to setup the
Outbound Routes to use this trunk and setup an
Inbound Route for your DID. If the DID is set to
Device in the Crazytel portal, set up the Inbound Route for the SIP endpoint
username. If the DID is set to
Server set up the Inbound Route for the DID in E164 format (61712341234).
