1. If you aren't already logged in, head to our portal (
portal.crazytel.com.au) and login with your credentials. If you haven't signed up you can also do that
here.
2. Once you are logged in, click on the
Ring Groups page in the left hand menu. When the page has loaded click on the Add New Ring Group button on the right.

3. This will open a pop-up window for you to enter the information:
- Ring Group Name: The name of your ring group.
- Type: Selection of how the call will ring the destinations
- - - Ring All: This will ring all the destinations simultaneously
- - - Pick Randomly: This will pick one destination at random. You can give each number a weight to be more likely to be chosen. The higher the weight number the more chances it has to be chosen..
- - - Ring in Order: This will ring each destination in the order of the list. You can set a timeout in seconds to go to the next number.
- Dest. Type: Select the type of destination.
- - - SIP Trunks: Will display a selection selection of your SIP Trunks
- - - Call Forward: Will allow you to enter a number.
- Destination: This will either display a list of your SIP Trunks or allow you to enter a number
- - - Weight: Enter a number to weight the likelihood of the number being called. This will only display if Pick Randomly is selected as the Type.
- - - Timeout: Enter a time in seconds for the call to go to the next number. This will only display if Ring in Order is selected as the Type. Please note that Timeout time on the last destination will cause the call to overflow to the Second Destination on the DID. If you do not have a secondary destination it will be best practice to make this timeout quiet high.
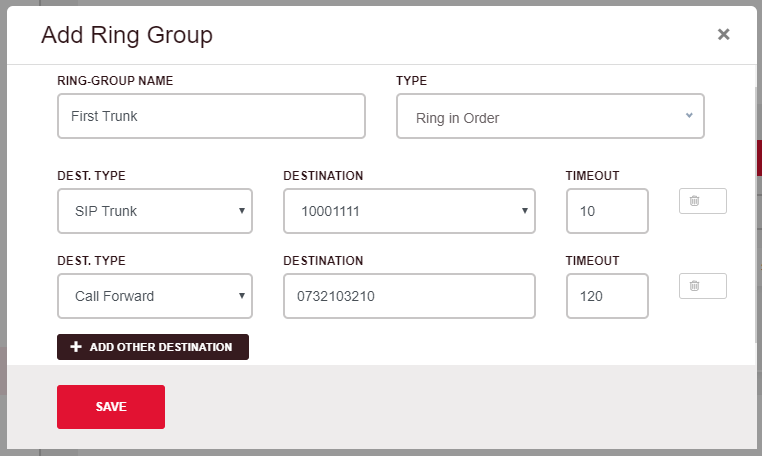
4. Click Save to save your Ring Group.
5. You will now need to update your number to ring your ring group. Go to Number Management -> My Numbers and select the number you want to update.
6. In either the First or Second Destination select Ring Group as the Type of Forwarding. Then select your Ring Group from the Forwarding Destination drop down menu.
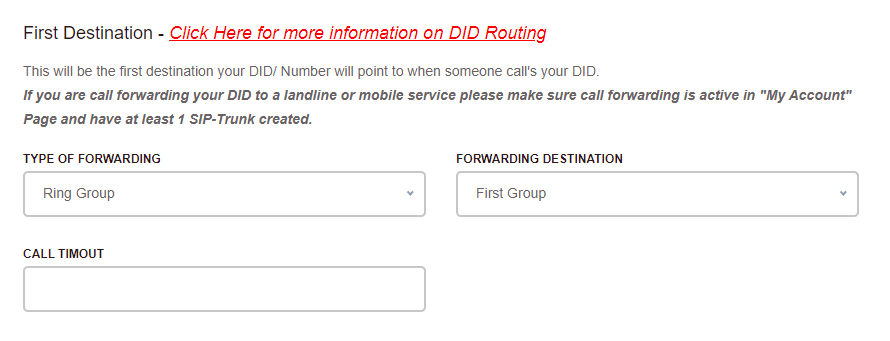
7. Click Save to update your number.
