If you are using an ATA that has been previously used for another provider, please factory reset it before continueing to ensure no previous setting affect the new setup.
1. Connect the Cisco ATA device to the phone, power and an ethernet cables. For this guide I will be using the Cisco SPA112.
2. To check the check the IP Address to log into the ATA device dial ****
. You will then hear a voice menu prompting you to "Enter
the menu option". Press
110# to hear the IP Address.
3. After entering the IP address in the web browser, you will see a log-in screen. The default username is password is:
- User Name: admin
- Password: admin
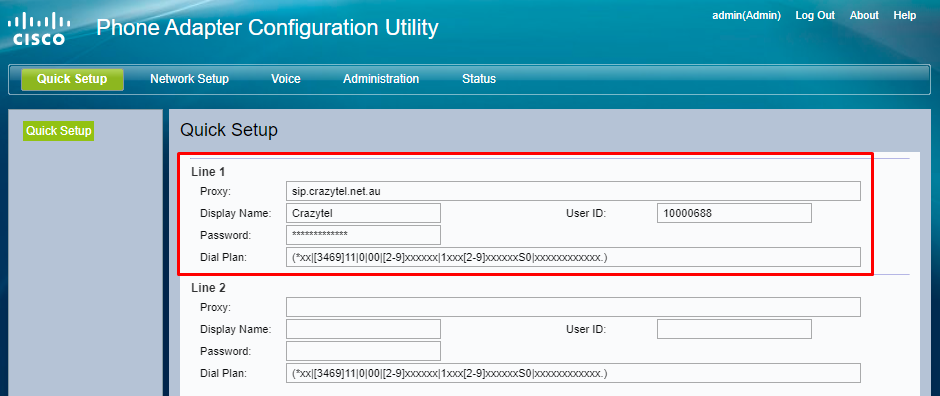
 2. You will be taken to the Quick Setup page. Enter the following information into the corresponding Line your phone is plugged into.
- Proxy: Crazytel SIP Trunk Domain.
- Display Name: used to identify the line/phone.
- User ID: Crazytel SIP Trunk Username.
- Password: Crazytel SIP Trunk Password.

3. Click Submit to save the changes.
You will now be able to make and receive calls through your Crazytel service.
HELPFUL TIPS:
If you have factory reset your ATA and the Dial Plan ins't available, please find the default dial plan below:
([2-9]xxxxxxx|0[234578]xxxxxxxx|1[38]00xxxxxx|1[3]xxxx|000|0011x.)
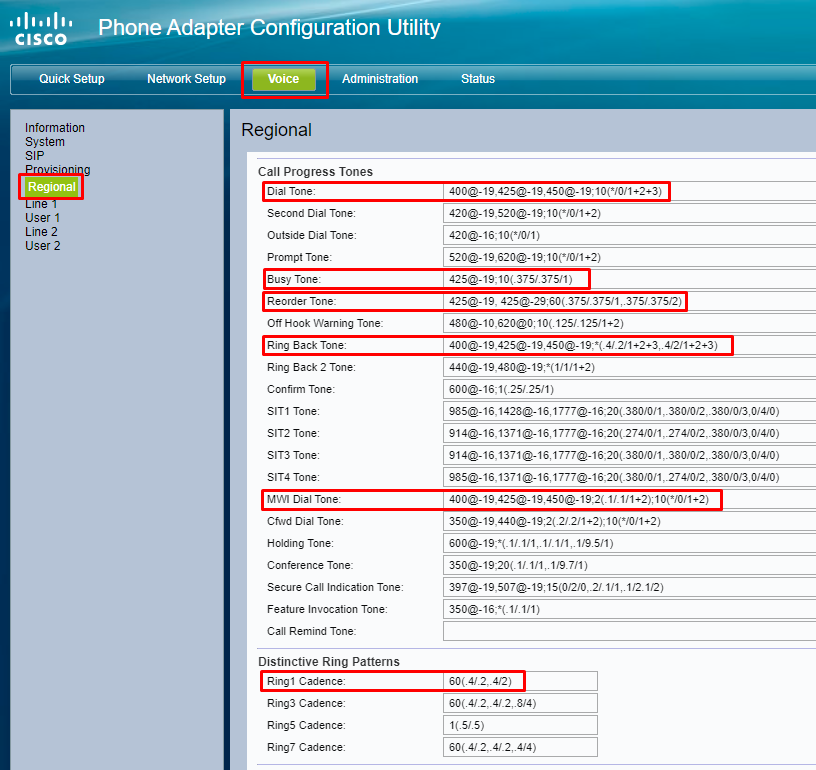
If you would like to have the Classic Australian Telecom dial and busy tones, please copy and paste the below information into your ATA.
To update the dial tones select Voice from the top menu then click on Regional in the left hand menu. Then on the page enter the following details.
Under Call Progress Tones
- Dial tone: 400@-19,425@-19,450@-19;10(*/0/1+2+3)
- Busy Tone: 425@-19;10(.375/.375/1)
- Reorder Tone: 425@-19, 425@-29;60(.375/.375/1,.375/.375/2)
- Ring Back Tone: 400@-19,425@-19,450@-19;*(.4/.2/1+2+3,.4/2/1+2+3)
- MWI Dial Tone: 400@-19,425@-19,450@-19;2(.1/.1/1+2);10(*/0/1+2)
Under
Distinctive Ring Patterns- Ring1 Cadence: 60(.4/.2,.4/2)
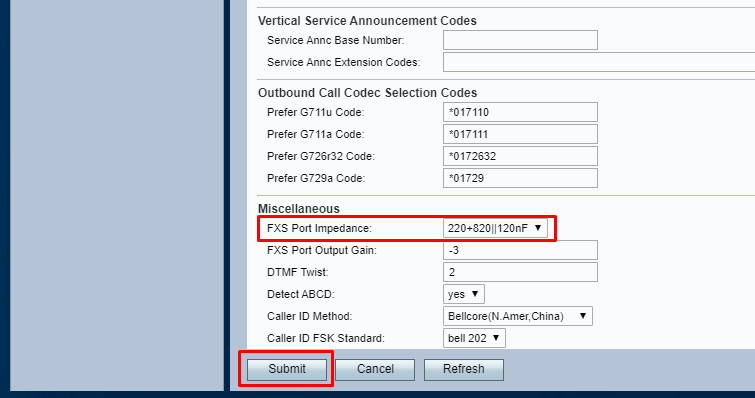
Under
Miscellaneous (scroll to the bottom)
- FXS Port Impedance: 220+820||115nF


Then click
Submit to save the settings.
