Before adding the SIP Truck to 3CX, please make sure you have created an
Extension and added your
Phone.
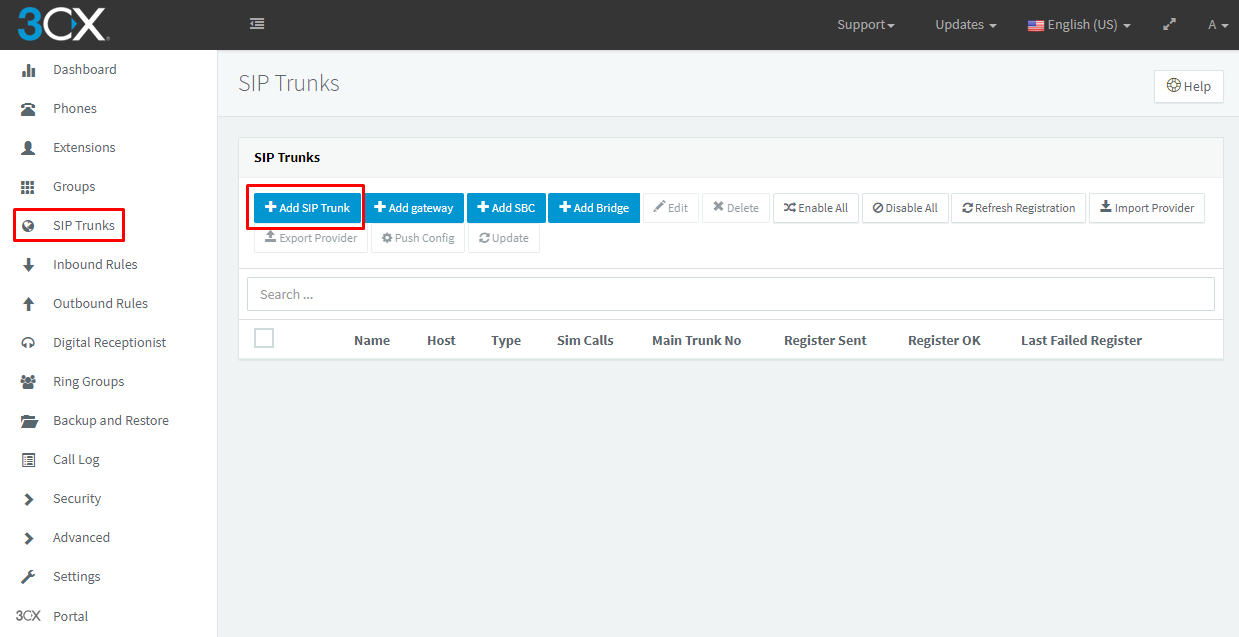
1. Login to your 3CX Installation and go to the
SIP Trunks page. Click on the
Add SIP Trunk button.
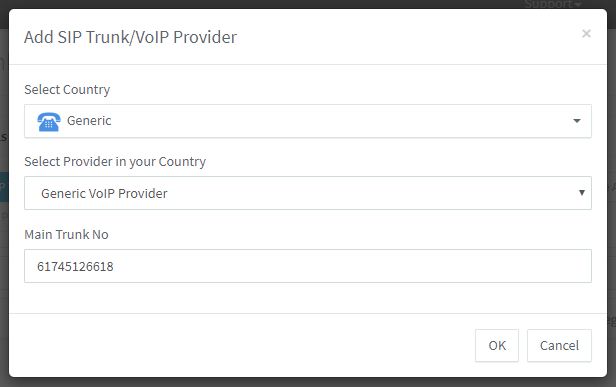
2. In the popup window, select/enter the following details, then click
OK:
-
Select Country: Generic
- Select Provider in your Country: Generic VoIP Provider
- Main Trunk No: This can be the DID you purchased through Crazytel
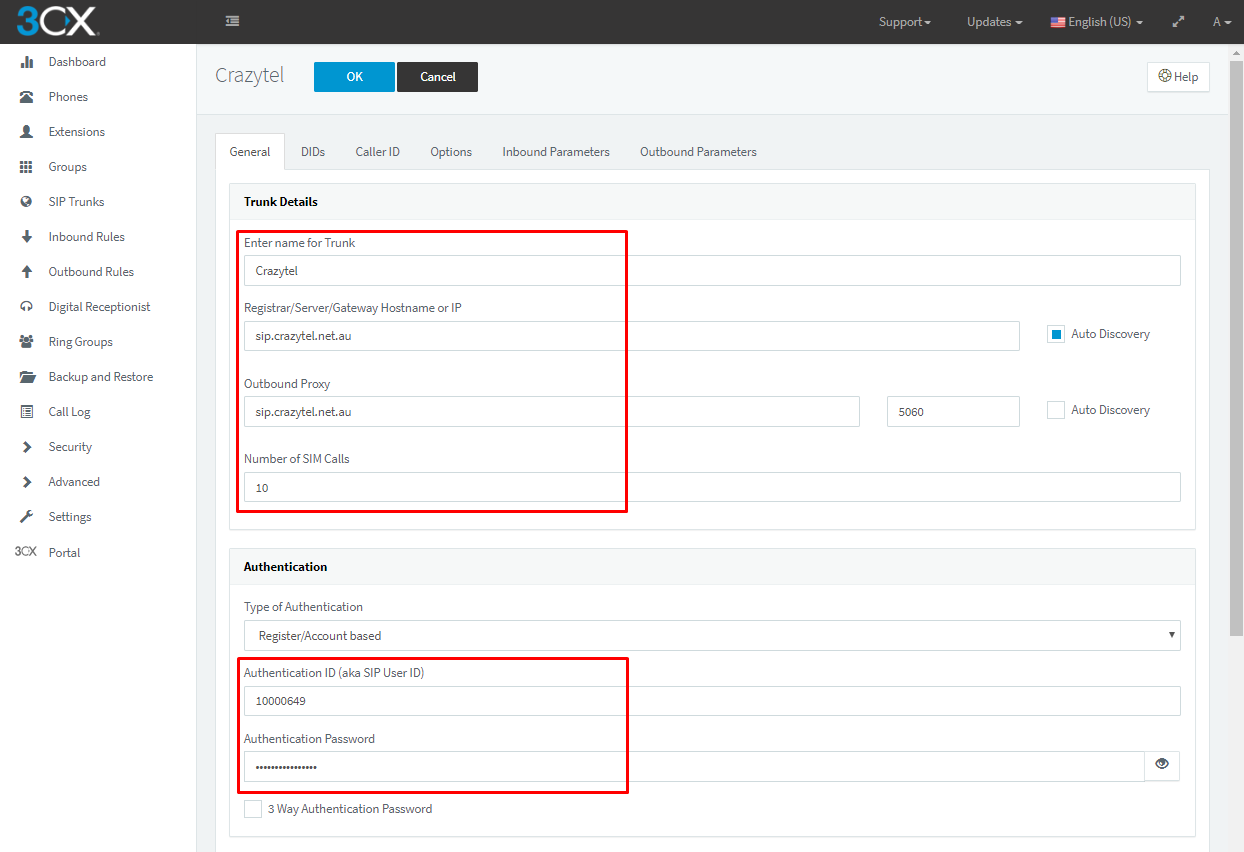
3. Enter the following details under the General tab:
- Enter name for Trunk: Used to identify trunk (can be anything).
- Registrar/Server/Gateway Hostname or IP: obtained from Crazytel.
- Outbound Proxy: obtained from Crazytel.
- Number of SIM Calls: This will be set on your account under My Account. The default is 10.
- Type of Authentication: Register/Account based
- Authentication ID: obtained from Crazytel.
- Authentication Password: obtained from Crazytel.
You can also set your calls to Route to the Extension you setup earlier under the Route calls to section under this General tab
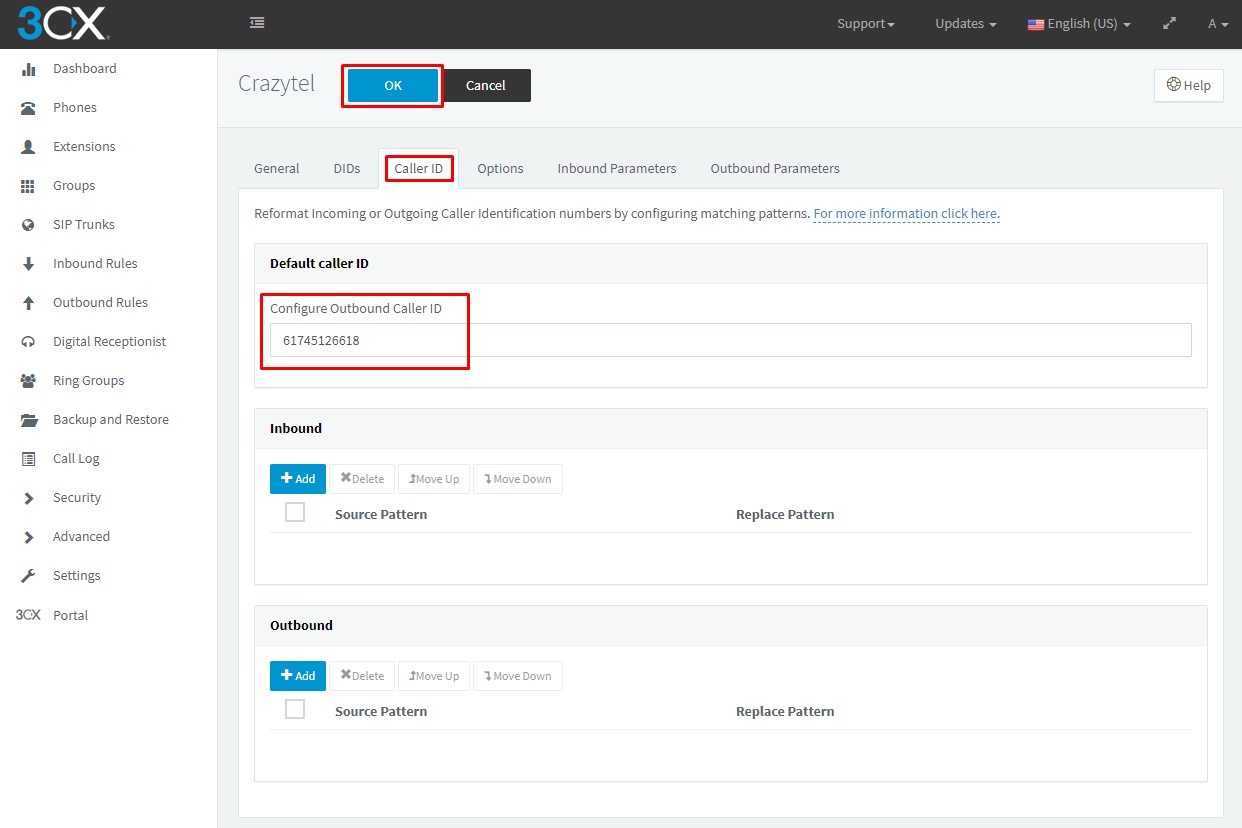
4. On the Caller ID tab you can Configure Outbound Caller ID. Click OK to save the details.