1. Download and install ZoiPer from their website (
zoiper.com). Follow the setup wizard to install the software.
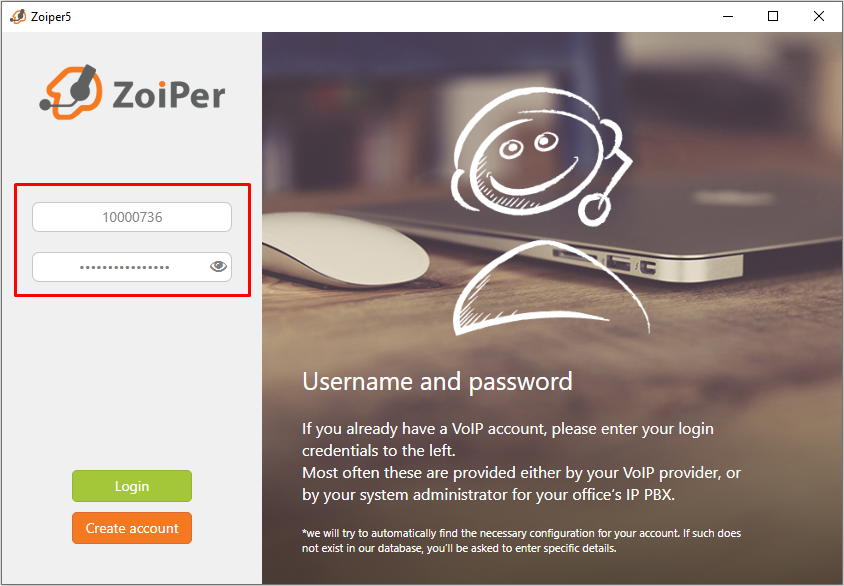
2. Once installed and opened you should see the setup wizard. Start by entering the
Username and
Password of your SIP Trunk. Then click Login.
3. Enter the
Domain as provided by Crazytel. Then click
Next.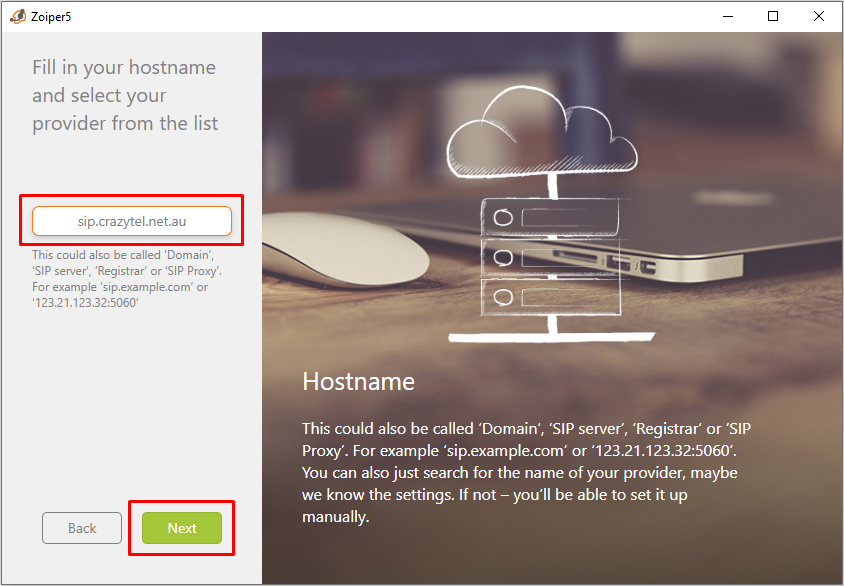
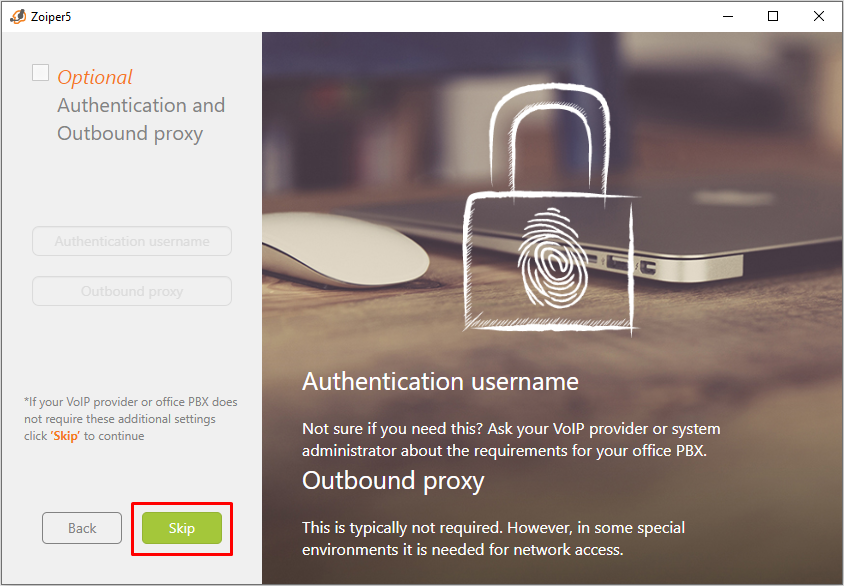
4. Entering an
Outbound Proxy is an optional feature. Crazytel will automatically use your closes POP. If you do wish to know more your can read more about our
Custom Outbound Proxy Settings here. Click on Skip.
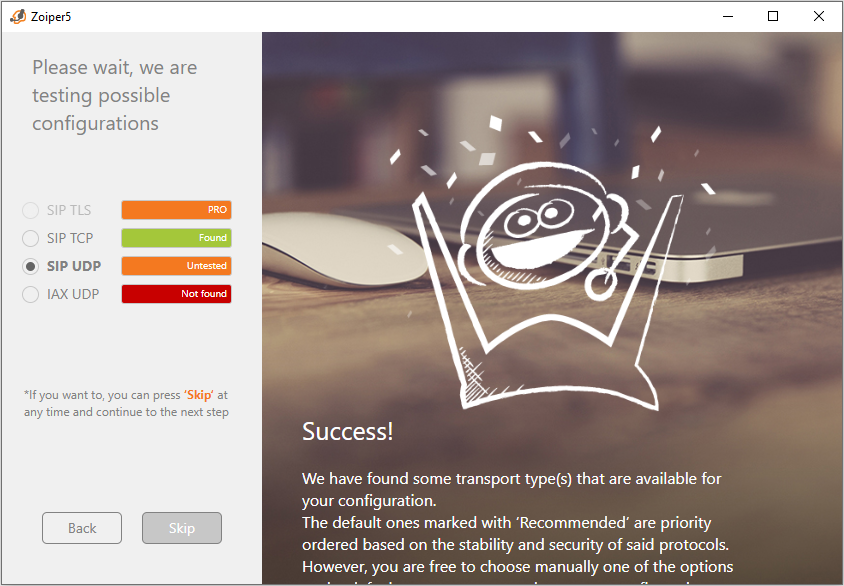
5. Zoiper will now try to select a
Transport Type. Feel free to click
Skip here as we will set this up later.
6. Enter a Name for the account. This can be anything that will help you remember the account.
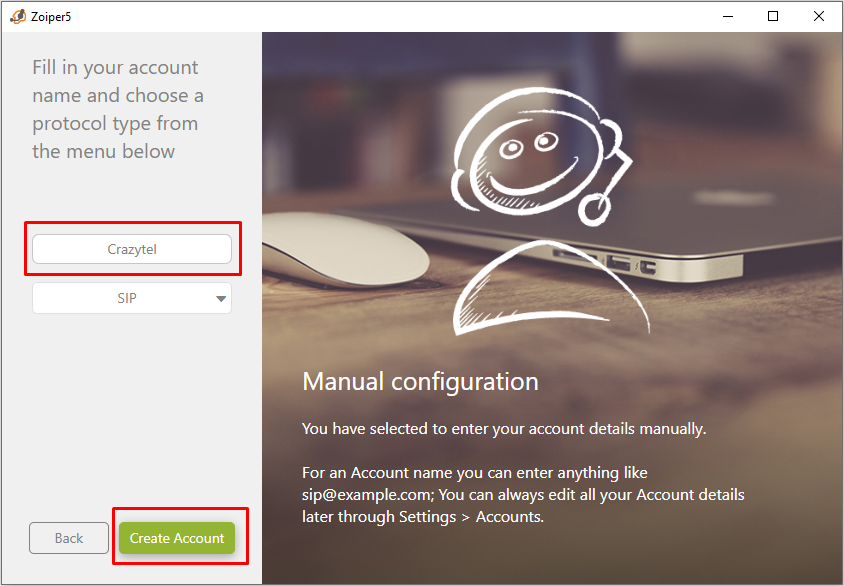
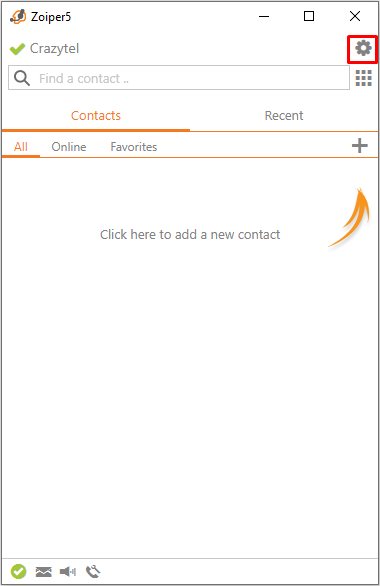
7. The account has now been created, but we will need to select the Transport Type we skipped earlier. Click on the Settings Icon in the top right of the app.
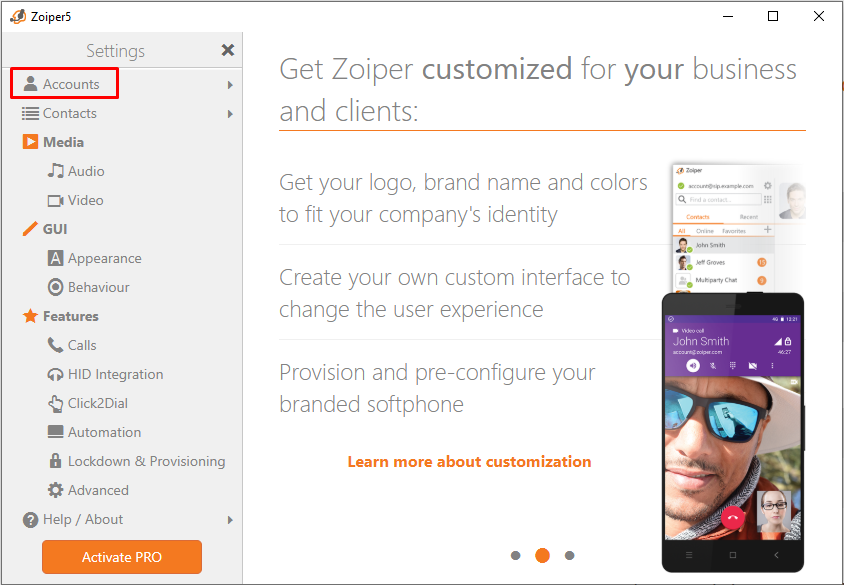
8. In the left-hand menu click on Accounts to get to the account you just created.
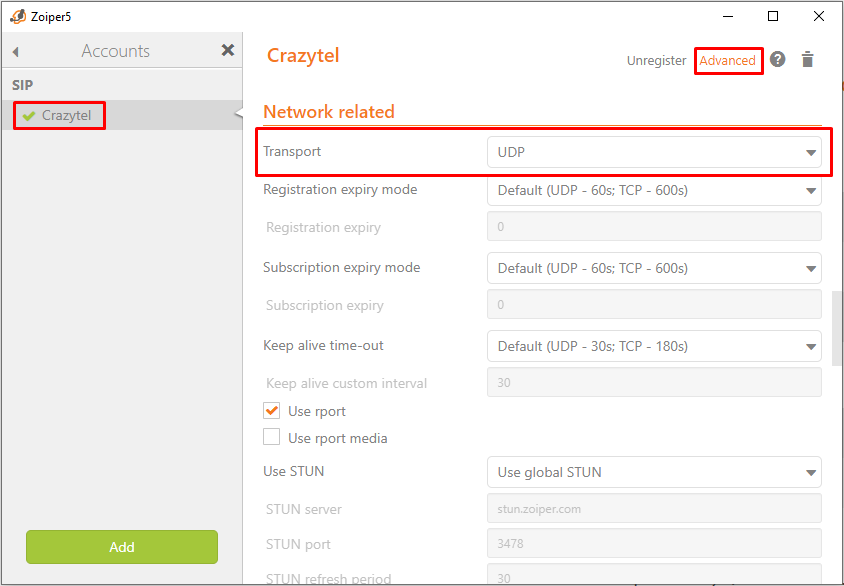
9. In the left-hand menu click on the Name of the Account you just created. In the top-right click on Advanced and scroll down to the Network Related section. Select UDP from the Transport drop-down menu.
10. Exit out of the settings menu. You will now be able to make and receive calls through your Crazytel service.
